I'm writing this post today because I found this great ongoing swap called #hexiefriends. I was introduced to it on
Instagram which is actually the social media website that you use to participate in the swap. The original post about the swap can be
found here. However, it has very few rules and I often find that swappers might bend them a little or have questions about what is proper swapping with this. I also find that some swappers will go the extra mile and make it really fun!. I thought it might be appropriate to list out some of the things that can really make #hexiefriends fun and super enjoyable!
The main rules are:
1. All hexies have 1 inch sides.
2. The center hexy fabric should be white or light, solid or low volume.
3. The center hexy will have writing on it indicating the person and location of where the hexy flower originated.
4. Send direct messages to other swappers who might be interested so you can exchange addresses and preferences for color, style, etc.
That is basically it. I'll post some pictures at the end so you can see what they look like. Here's one:
Here are some other non-rules that I like to use as guidelines/tips/etiquette:
- If the center hexy fabric is not white or off-white, make sure you can easily read your writing. I often request white centers because they work best. I've found also that using a solid fabric is easier to write on. Often prints will make it difficult to move the pen. I would also suspect that the ink from the pen will stay steadfast on a solid fabric better. My "go to" fabric is Kona Solid White. I've had great success with it and any quilter worth their weight keeps a load in the stash (in my opinion only), or at least an off-white background solid fabric.
- My favorite pen for writing on the center hexy fabric is Micron size 08, available on Amazon or in Joann's Fabric Stores (and several other crafty stores).
- What do I write on the center hexy? Mainly your name, however you want. Some people put first/last, some first and last initial, some instagram name, some a little of each or all! Then where the hexy flower came from, not necessarily where you are from... If that was the case, mine would say Kansas, but that makes no sense because I made it where I live now. I think it makes more sense to put the hexy's birthplace rather than yours :)
- Glue or thread basting is acceptable, but I would ask before using glue. Some people do not like it. I'm fine with either. If thread basting, I find it totally awesome if you only basted on the back and not through the template, that way I can leave the threads in and save a step, but it's totally up to you!
- Papers: Leave them in for at least the 6 outside hexies. You can take the center one out if you like. Many swappers are planning to whip stitch more hexies that join to your flower. It's difficult to do without the papers still in. I'm planning to applique mine, so it doesn't really matter, but I think I am in the minority. LEAVE THEM IN.
- Try not to make your preferences too difficult for your swap partner. Color or general style (bright, novelty prints, stripes) are okay, but something like "anything with watermelons on it" would be too specific! Give more than one option if you are not sure. I find that most will say they have no preference or that they want you to pick whatever you like, or something that represents your taste.
- Mailing USA Domestic: I can only attest to mailing in the USA or from the USA. I use envelopes similar in size to mailing a small birthday card. The hexy fits nicely. If this is all you put in your envelope, it only needs one first class stamp because it will be less than 1 ounce. If you are putting anything in extra, make sure it does not go over 1 ounce. If it does, the post office sells "extra ounce" stamps or you can just put on another regular stamp if you don't mind wasting the extra cents. In the past I have put in 7 extra templates, a postcard, and put it all in a Ziploc inside the envelope and it still did not go over 1 ounce.
- Mailing International: I use http://paypal.com/shipnow for international. 1 ounce or less is $1.20 to most destinations (not aware of anywhere it is more). You can purchase with your paypal account (make sure you have cash in it; they will charge fees for using a credit card) then you can print out the label and sign the customs form which is on the label. You can then drop them in the mailbox directly. Doing it through paypal gives you tracking information. You can also use first class international forever stamps (I think they are the same price) but you will not have tracking.
- Extras: You don't have to put in extras, but I like to do it. I put in some of my fun templates (see link on upper right hand side of my blog), sometimes a small piece of fabric, sometimes a postcard from New Jersey! I think it's fun to get something that represents where the swapper/hexy flower is from!
- Looking for #hexiefriends ???: search #hexiefriends on Instagram then leave a comment on a photo that comes up saying you are interested in swapping! That's the best way to find swappers.
- Sending direct messages: Most swappers are using the direct message function on Instagram. It's on the home page of the app in the upper right hand corner. It looks like a drawer (chest/nightstand type). You must include a photo to send a direct message. I recommend writing out your address and snapping a photo, especially if it is for someone international. This way they know how to format it on the envelope, or... just use one of your hexy pictures!
- Keeping track: I use a spreadsheet, but you could use regular paper to keep track of your swapping. I've heard some say they make a notecard for each and keep them in a small box. I take note of the Instagram handle/name of the person, the real name and address, preferences, the date I sent and the date I received in return.
- What if my swapper never sends me one in return? Hmmmm... tough call. If you are keeping track of dates (i.e. when you mailed yours), I would give them at least a month. We know it can take a long time to make one and I know some people have a long list of committed swaps. If a month passes from the date you mailed yours, send them a tactful direct message on instagram saying that you hadn't seen one come back yet and just wanted to get a status update. Hopefully it didn't get lost in the mail. Ideally they will say that they have been busy, but haven't forgot about you! It's also a good idea to notify them when you are sending it out. It serves as a reminder that you are swapping with them.
- SHARE YOUR #HAPPYMAIL on instagram and mention them in the comment/caption (@amateurquilter for example) so they know you got it and that you like it! Don't forget to also hashtag it #hexiefriends so others will see it. You may get more swappers this way!
These are just guidelines and solely my opinion. I often get asked, especially from newbies, what is the proper way and how they should do it! Now you know at least how I do it!
Feel free to
follow me on Instagram or any other social media (listed below and to the right on the side bar).
Yours in hexiness...
Mike.
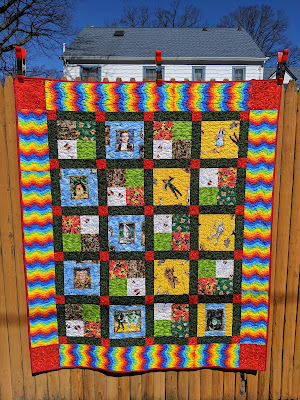
Now for the pics:
Until next time,
Mike.
@AmateurQuilter
I have Google+ comments activated, so if you are having trouble commenting you can comment on my
Facebook page,
Twitter feed,
Flickr,
Instagram, or
Pinterest pages! ...On any of my photos or posts!!! I love getting comments! You can also email me at amateurquilter at gmail dot com! I will always respond! Thanks for stopping by! .... Mike.